
how to install a child bike seat safely is mostly about fit and verification: matching the seat to your bike, tightening to the right spec, then doing a short, picky test ride before your child ever climbs in.
If you have ever felt a rear rack flex, noticed a seat shifting after a curb, or realized your frame has an odd shape that “almost” fits, you already know why this topic matters. A child seat is not a normal accessory, it changes handling, stress points, and your margin for error.
Also, “installed” is not the same as “installed well.” Many problems come from small mismatches: the wrong rack rating, under-torqued clamps, a quick-release axle used where it should not be, or a seat that is technically compatible but sits too far back.
This guide walks through the decision points that usually trip people up, a quick self-check to confirm compatibility, and a practical step-by-step install you can follow whether you have a rear frame-mount, rear rack-mount, or front-mounted option.
Start with the right seat style for your bike
Before you touch a tool, confirm what type of child seat you have and what your bike can realistically support. Most seats in the US fall into three buckets, and each has different “gotchas.”
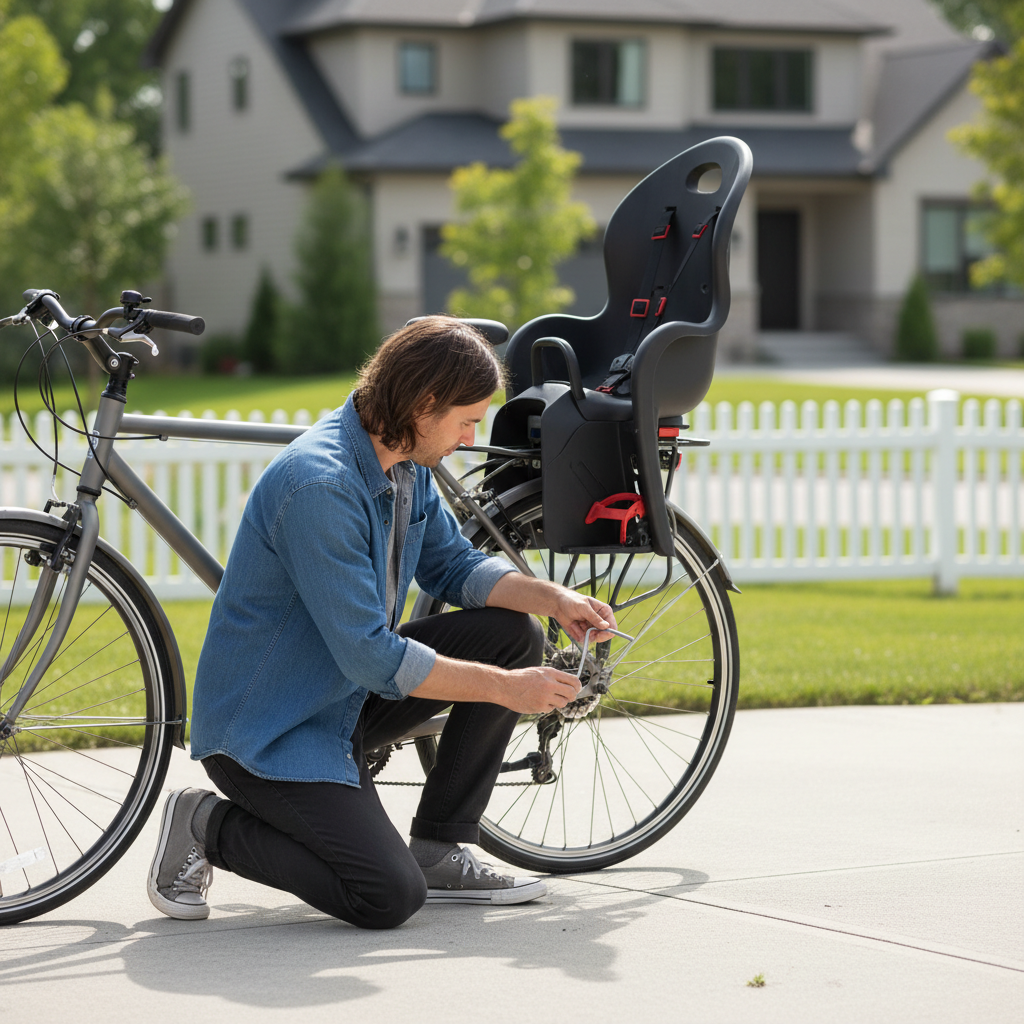
- Rear frame-mounted seats: clamp to the bike frame (often the seat tube) and float above the rear wheel on a springy bar system. Great for bikes without a rack, but picky about frame shape and clearance.
- Rear rack-mounted seats: bolt to a cargo rack. Stable when matched correctly, but only as safe as the rack’s rating and hardware.
- Front-mounted seats: mount near the handlebar/stem area. Better for smaller kids and shorter trips, but they can affect steering feel and may not fit some modern cockpits.
According to the National Highway Traffic Safety Administration (NHTSA), a properly fitted bicycle helmet is important for every ride, including child passengers, so plan your setup around helmet clearance and comfort, not just mechanical fit.
Compatibility checklist (quick self-test before installation)
If you want to install a child seat without surprises, this is the five-minute check that saves the most frustration.
- Bike type: Many child seats are not recommended for carbon frames, full-suspension mountain bikes, or very lightweight race builds. Check your seat manual and your bike manufacturer guidance.
- Brake and axle setup: Disc brakes and thru-axles can change rack compatibility. If your seat relies on a rack, confirm the rack fits your axle type.
- Rack rating (if rack-mount): The rack must be rated for child-seat use and for the combined load of child + seat. If the rack spec is vague, treat that as a warning sign.
- Frame geometry: For frame-mount seats, look for enough straight, unobstructed seat tube and clearance from rear tire and fender.
- Wheel size and fenders: 26–29 inch wheels are usually fine, but tight fender clearance can cause rubbing when the bike flexes.
- Rider fit: If the seat pushes you forward or prevents full leg extension, you will ride worse, which can matter more than you think.
Key point: if your install depends on “making it work” with extra spacers, improvised clamps, or odd bolt substitutions, pause and verify with the seat manufacturer or a bike shop.
Tools and parts you will usually need
You can do most installs at home, but the tool choice matters because over-tightening can crush a frame tube, and under-tightening can let the seat creep.
- Torque wrench with hex bits (commonly 4, 5, 6 mm)
- Allen keys (backup)
- Open-end wrench or socket set (depending on rack hardware)
- Medium-strength threadlocker (only if the manual allows it)
- Measuring tape (for centering and clearance checks)
According to Park Tool, using a torque wrench for critical fasteners helps prevent both stripped threads and damage from over-tightening, which is especially relevant when you add a child seat to a bike.
Step-by-step: how to install a child bike seat safely
This section assumes you already chose a compatible seat and read the manufacturer manual once. The manual still wins if anything below conflicts with it.
1) Prep the bike and work area
Put the bike on a stable surface. If you have a repair stand, great, but a wall plus a steady hand also works. Remove anything that interferes, like a saddle bag, rear light, or bulky fender stays near the mount point.
Wipe mounting surfaces clean so the clamp sits flat. Dirt between clamp and frame can make torque readings misleading.
2) Install the mounting bracket (frame-mount seats)
Position the bracket on the seat tube at the height specified by the seat maker, then loosely fit bolts so you can still adjust alignment. Keep the bracket centered with equal gap on both sides.
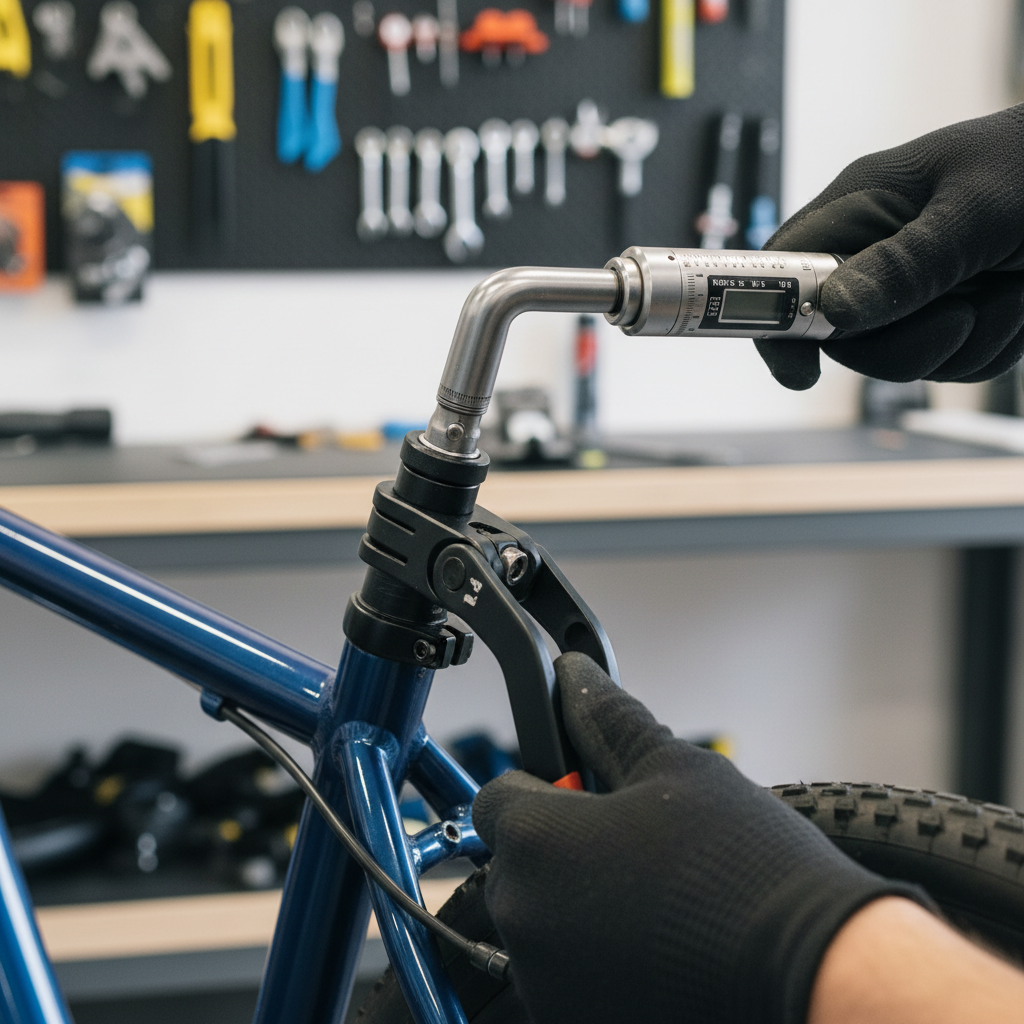
Now tighten to spec using a torque wrench. If your bike has a delicate frame material, this is where people most often go wrong. Tight is not the goal, correct is the goal.
After tightening, grab the bracket and try to twist it by hand. You want “solid, no movement.” If it moves, do not keep riding with it and hope it settles.
3) Install or verify the rack (rack-mount seats)
If your seat mounts to a rack, install the rack first and treat it as a structural component, not a basket holder. Use the rack manufacturer hardware, confirm all attachment points are used, and re-check alignment so the rack deck sits level.
- Confirm heel clearance: your foot should not hit the seat or rack struts when pedaling.
- Confirm tire clearance: spin the wheel and ensure nothing rubs, including under side-load.
- Confirm brake and rotor clearance on disc setups.
If you cannot get a rack stable without bending struts, mixing hardware, or skipping an attachment point, it is usually safer to choose a different rack or a different seat style.
4) Attach the seat to the bracket or rack
Slide or click the seat into its interface, then lock it per the design. Many seats have a secondary safety latch, do not ignore it because it feels redundant.
Center the seat over the bike’s centerline. Even a small left-right offset can make the bike feel like it wants to “fall” to one side at low speed.
5) Set harness, footrests, and position for your child
Mechanical install is only half of how to install a child bike seat safely. Fit matters, because loose feet and loose straps create avoidable risk.
- Harness: snug enough that you cannot pinch excess webbing easily, but not so tight it restricts breathing.
- Footrests: adjusted so knees bend comfortably, straps secured so feet cannot contact spokes or rotor.
- Helmet clearance: the helmet should not push the child’s head forward against the seat back, which can happen on some high-back designs.
Safety checks before the first real ride (don’t skip this)
Do these checks with the bike stationary, then again after a short empty test ride.
- Shake test: hold the seat and firmly shake side-to-side and up-down, you are hunting for any clunk or slip.
- Fastener check: verify each bolt hits its torque spec, especially after the first tightening when parts “bed in.”
- Clearance check: turn bars fully, compress the rear wheel slightly, and confirm nothing contacts tire, chain, or brake.
- Locking indicators: if your seat has a visual indicator window or click, confirm it shows locked.
According to the Consumer Product Safety Commission (CPSC), following product instructions and using equipment as intended is a core part of preventing injuries, which is why the manufacturer’s install and weight limits matter more than internet hacks.
A quick reference table: common setups and what to watch
| Seat setup | Best for | Common risk points | What to double-check |
|---|---|---|---|
| Rear frame-mounted | No rack bikes, hybrids | Clamp slip, frame clearance | Seat tube fit, torque spec, tire/fender gap |
| Rear rack-mounted | Commuter bikes with rated racks | Rack flex, under-rated rack | Rack load rating, all mounting points, bolt re-check |
| Front-mounted | Smaller kids, short trips | Steering interference | Handlebar turn clearance, cable routing, rider knee space |
Real-world tips for a smoother, calmer ride
Once the seat is on, your bike will not feel the same, and that is normal. The goal is predictable handling, not “exactly like before.”
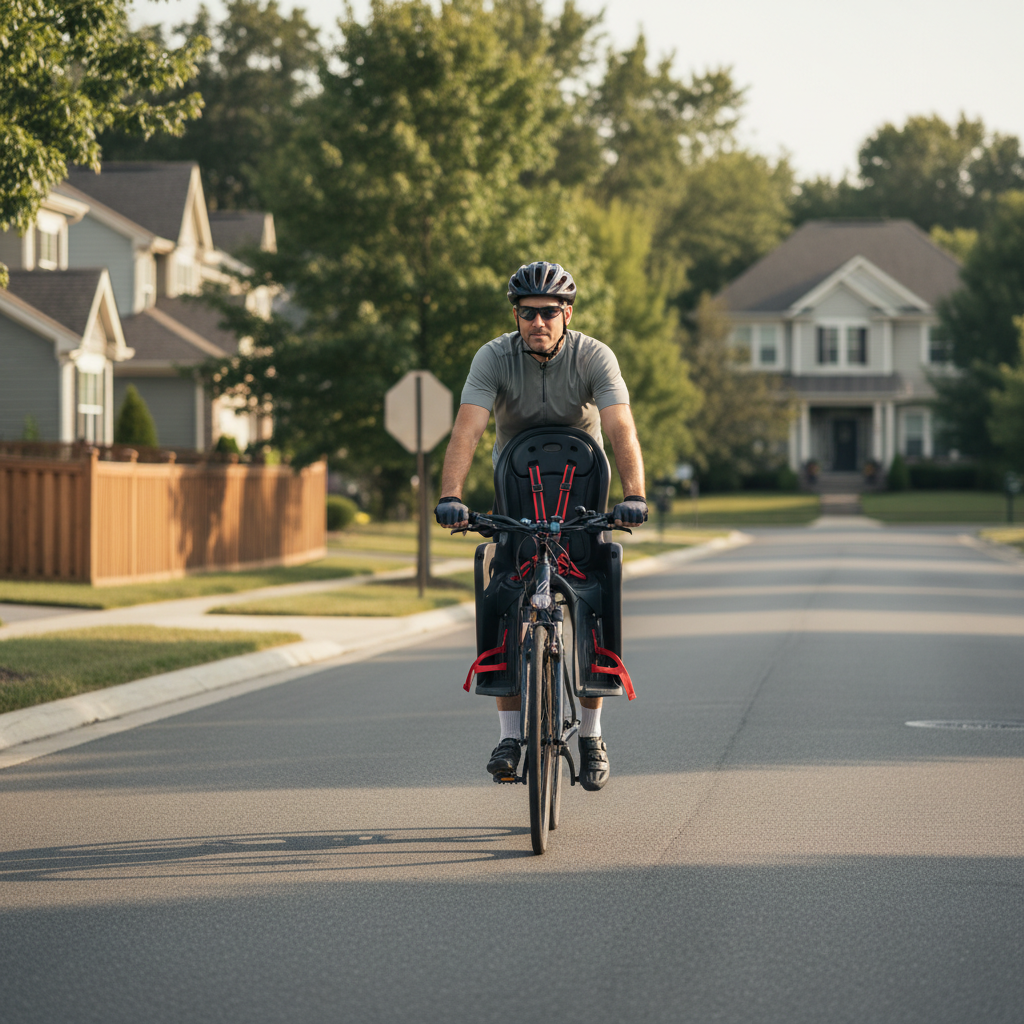
- Practice empty first: do starts, stops, and slow turns in a parking lot before adding passenger weight.
- Lower your speed expectations: braking distance increases, and slow-speed wobble becomes more likely.
- Adjust tire pressure: many riders prefer slightly higher rear pressure for stability, within the tire’s printed range.
- Plan your route: fewer potholes, fewer sudden merges, and wider shoulders reduce “surprise” steering inputs.
If you are teaching yourself how to install a child bike seat safely because you want family rides to feel routine, this part helps more than people admit: handling confidence is a safety feature.
Common mistakes that make an install feel “fine” until it isn’t
- Skipping the torque wrench: bolts can feel tight while still being wrong, in either direction.
- Using an unrated rack: a rack that carries groceries may still be a poor match for a child seat.
- Letting straps dangle: loose foot straps can drift toward spokes or rotors.
- Not re-checking after the first rides: vibration and settling can change bolt tension, a quick re-torque is cheap insurance.
- Ignoring fit because the seat “clicks in”: click does not guarantee correct bracket position or correct clearance.
When to get help from a bike shop (or the manufacturer)
Some situations are worth professional eyes, even if you are handy.
- Your bike has a carbon frame, integrated seat mast, or unusual tube shapes
- You need a rack adapter for a thru-axle and are unsure which one matches
- The seat shifts even after tightening to spec, or any part shows cracking, bending, or stripped threads
- You are unsure about weight limits or your child is close to the seat’s maximum range
Many shops will do a quick safety check or confirm torque values. If anything feels ambiguous, asking is reasonable, especially when the passenger is a kid.
Conclusion: a safe install is a system, not a single step
Once you understand how to install a child bike seat safely, the pattern is consistent: choose the right mounting style, tighten to spec, verify alignment and clearance, then do a short test ride and re-check hardware after a few trips.
If you want one action to take today, make it this: pull the manual back up, confirm the rack or bracket rating, and do a torque re-check before the next ride, it is quick, and it catches the issues that usually show up late.